


Content:
Sending documents to RAMD 
Creating and signing a document«Прием»
Video Tutorial
Why: to arrange a patient's visit and prepare medical documents (EMDS) for sending to the USISZ.
What to do:
1) Create a document«Прием», specify the patient, doctor, date.
2) Add lines with the necessary Reception Patterns (for example, «Протокол консультации»). Only configured templates with the Registered type of EMD selected will be sent to the EGISZ.
3) Fill in the data in the templates (as usual).
4) Sign the document:
- Only the user with the EDS set up in the settings can sign documents.
- Click «ЭП»the (Electronic Signature) button in the document.
- To sign everything: Click Sign Everything. The program will check whether this doctor (according to his position) can sign this type of document.
- To select: Click «Подписи», tick the desired documents (templates) and click «Подписать».
5) At the first signature, the system will check the doctor's details (SNILS, position) and the completeness of the required fields in the template.
Here, on the right, is a list of the SAMD fields that the Ministry of Health of the Russian Federation has established for this registered type of medical document. They must be compared with the template parameters.
Creating and signing a document«Прохождение медосмотра»
Why: to register the results of professional examinations in the EGISZ.
What to do:
1) Create a medical examination document.
2) Fill in the patient and examination information.
3) The key to EGISZ: «Профессия»Please indicate the profession from the state classifier in the field. If the profession you need is not in the list, you need to add it by downloading the classifier.
4) Sign the doctor's EDS document. Medical examinations usually require the signature of both the document itself and its printed form.
The process of sending documents to RAMD
Video Tutorial
Why: transfer signed electronic documents to the state register.
What to do:
1) Go to the EGISZ Controller's Console. Here you can see the statuses of your documents.
2) Sign the documents ON BEHALF OF THE CLINIC (MO Technical EDS):
- In the Remote Control, find documents with a status that requires the signature of the Ministry of Defense (for example, "No signature of the Ministry of Defense").
- Click Go to SAMD validation on behalf of the Ministry of Defense.
- On the Signing tab, check the required documents.
- Click Set a mark, then Sign the marked documents.
3) Send the documents:
- Automatically (recommended): After creating the EGISZ integration settings with Medflex, the task «MR_РегламентноеЗаданиеОтправкаРЭМД»that is disabled by default will be recorded in the spiok of routine tasks. If you enable it, the documents will be sent automatically once a day.
- Manually:
- In the Control Panel, open the necessary documents and check the box next «Отправить»to it.
- Click the button«Авторегистрация сообщений через МедФлекс».
4) Document statuses in the Remote Control:
- Registered: The document was successfully accepted by the RAMD.
- Ready to send: The document is ready to be sent (waiting for automatic or manual sending).
- With errors: There was a problem when sending (see step 16).
- No response received: The document has been sent, but the response from RAMD has not yet arrived (it may take time).
- Documents without messages / Files are not generated / Not all signatures have been signed: They require actions within 1C (conducting, signing).
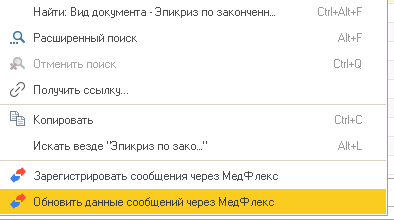
5) Updating these documents. If the result of document registration has not been received from Medflex for a long time, whether there are problems with the connection or the server, if necessary, you can manually request information about the status of a document. To do this, select the necessary documents in the EGISZ controller panel, right-click, and select«Обновить данные сообщений через МедФлекс»
Obtaining documents from other clinics
Why: View the patient's medical documents created in other hospitals (if the patient has given consent).
To search for documents, you must specify the organization where this document was generated. It is also possible to receive only those medical documents that were sent to the RAMD through the Medflex.
What to do:
1) Open the card of the desired Patient.
2) Go to the section for searching EGISZ documents (or EGISZ Integration -> EGISZ Medflex Document Search).
3) Press «Найти»the or button«Поиск в РЭМД». You can set filters (document type, dates).
4) In the list of found documents, select the appropriate checkmark.
5) Click the button to request the selected documents.
6) The documents will not arrive immediately (depends on the system and the other clinic). When they appear, you will see them in the patient's card on the Files tab (usually in PDF or HTML format). To open it, double-click on the file.
Correcting the document before sending it
Why: if an error has been found in an already signed document and it needs to be changed.
What to do:
1) Open the document (Admission or Medical examination).
2) Go to the Item Instance (Electronic Signature) tab.
3) Click Signatures.
4) In the list of electronic signatures, find the signatures of the doctor and the clinic (MO) for this document (or a specific template inside the document).
5) Select each signature and click Delete. You need to delete all signatures related to this document/template.
6) Make the necessary corrections to the document or template data.
7) Re-sign the doctor's EDS document (and, if necessary, the MO).
8) Resend the document.
Solving possible errors when sending documents to RAMD
- Common errors in registering documents in the RAMD
- Directory of errors in the integration of MIS with RAMD EGISZ
Sending a request for editing patient data to the IEMC
Often, when sending a medical document to the RAMD, an error may occur. The specified value is [Patient's name/Patient's SNILS/The patient's date of birth] [...] does not match the data of the ISU [...]. The patient was found using a local identifier. It means that the patient's data in the document does not correspond to the data registered in the EGISZ according to the SNILS specified in the document.
To correct this error, it is necessary to update the patient's data in the EGISZ using the IEMK.
To send requests to IEMK via the Medical Complex, your medical organization must be connected to the IEMK Medical Complex.
How to connect the Ministry of Defense to the medical complex in IEMK
1) Download the application template for the clinic - An application for connecting the Ministry of Defense to the medical complex in the IEMK (Clinic).
2) Download the application template for MedRoket - An application for connecting the Ministry of Defense to the IEMK Medical Complex (MedRoket).
3) Fill in the fields highlighted in red in both documents.
4) Prepare the application in 2 formats:
- DOC/DOCX with completed data
- PDF (scanned copy of the application with the seal of the organization and the signature of an authorized person)
5) Transfer the application files to the personal manager of MedRoket, he will send them to the technical support service of EGISZ for activation.
How to update patient data
1) Go to the directory «Клиенты».
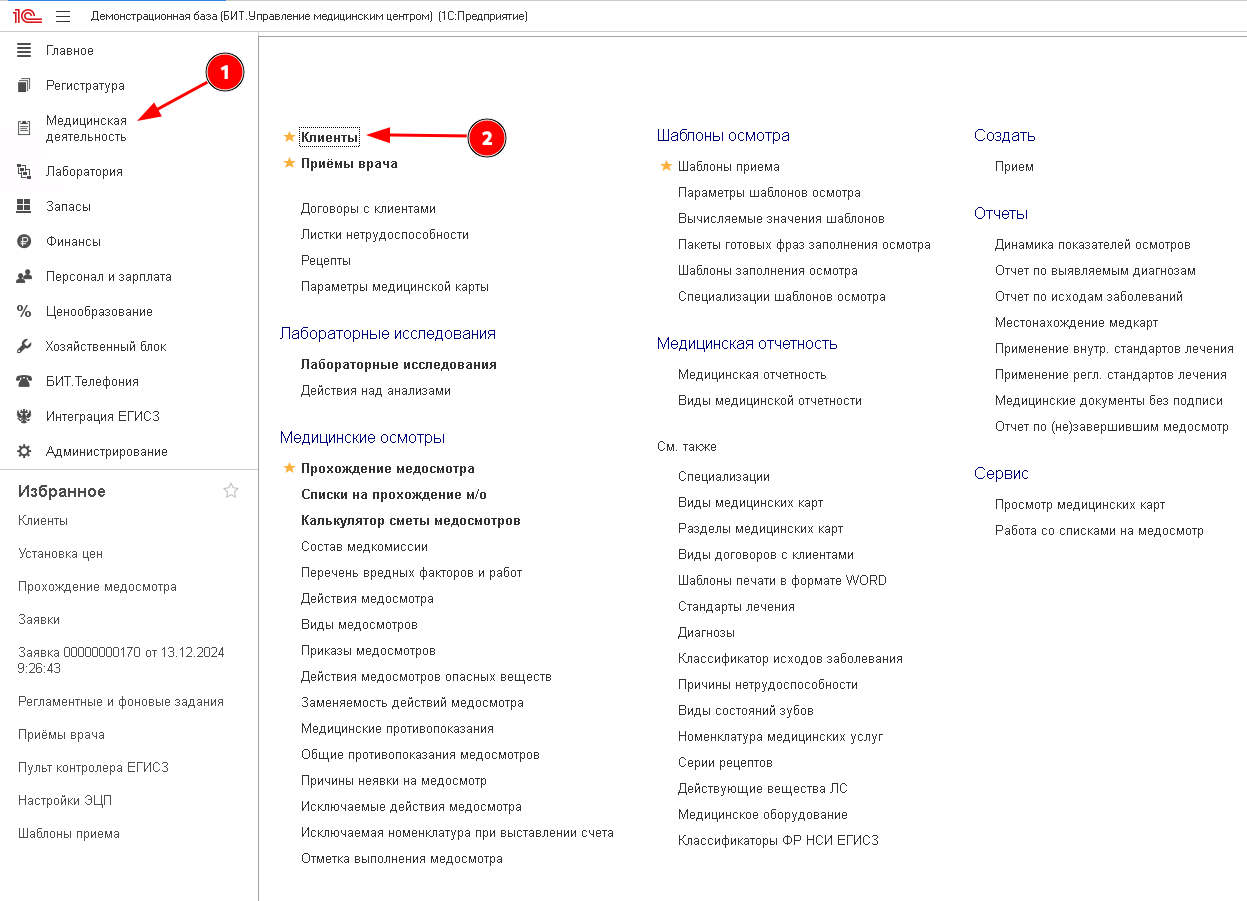
2) Select the desired patient.
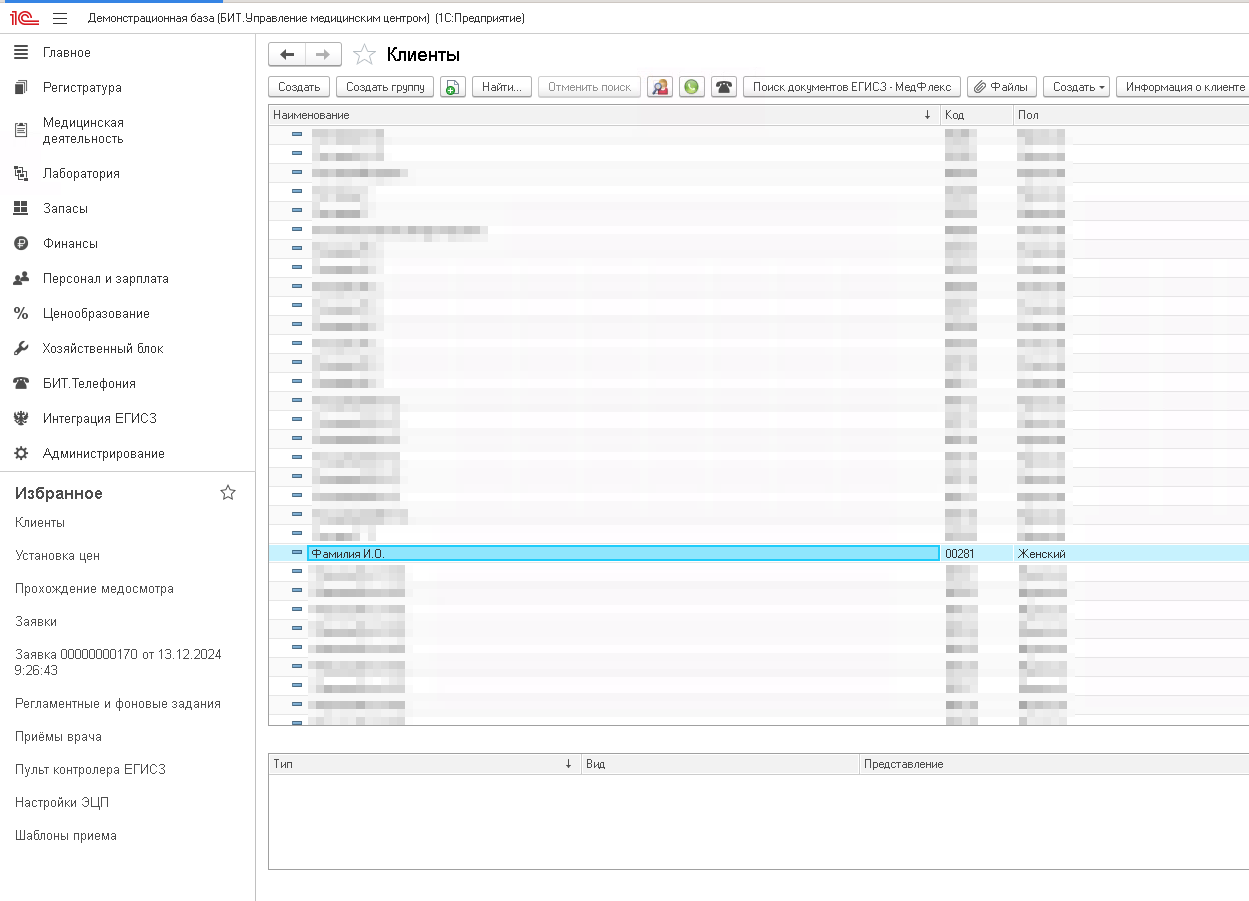
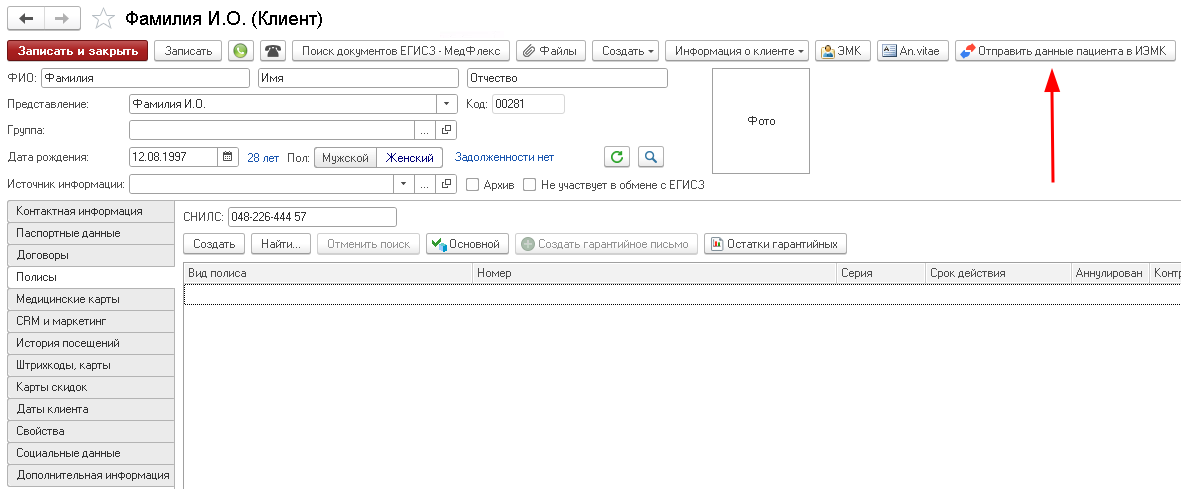
3) Make the necessary changes. After changing the data, it is important to save it by clicking the button«Записать».
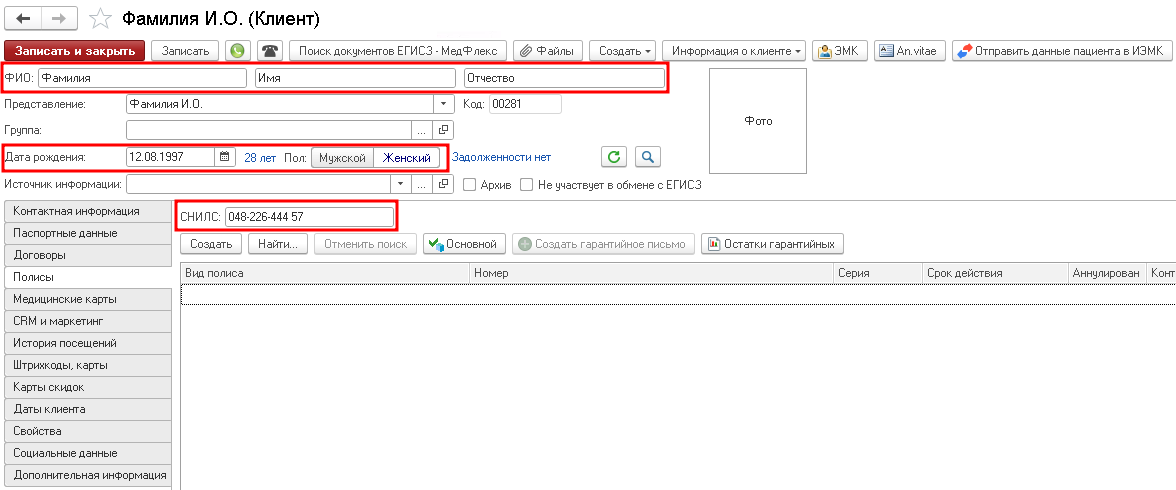
4) Press the button«Отправить данные пациента в ИЭМК».
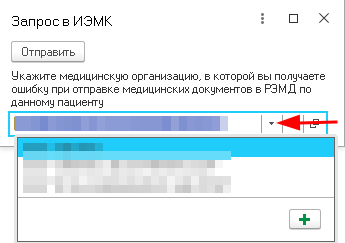
5) Choose a medical organization.
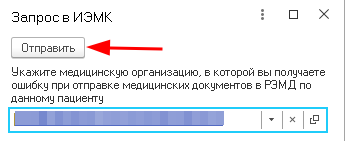
6) Click the "Send" button.
What patient data is transmitted to the IEMC:
- name;
- surname;
- patronymic;
- date of birth;
- floor;
- the SNILS number.
All fields, except for the patronymic, must be filled in. The patronymic is also required if the patient has it indicated in the passport.
Sending result
After clicking the button, a modal window with the result of sending is displayed. Possible results:
- «Пациент обработан успешно» - the request has been sent successfully;
- Error - its text is displayed.
Warnings that do not prevent the sending of data (for example, the absence of a middle name) are recorded in the registration log.
Examples of possible errors are given below.
Possible errors
Enable IEMK integration
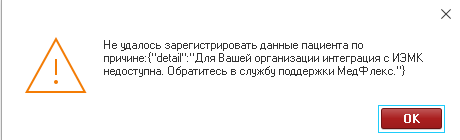
Contact your personal MedRoket manager.
Required fields are not filled in
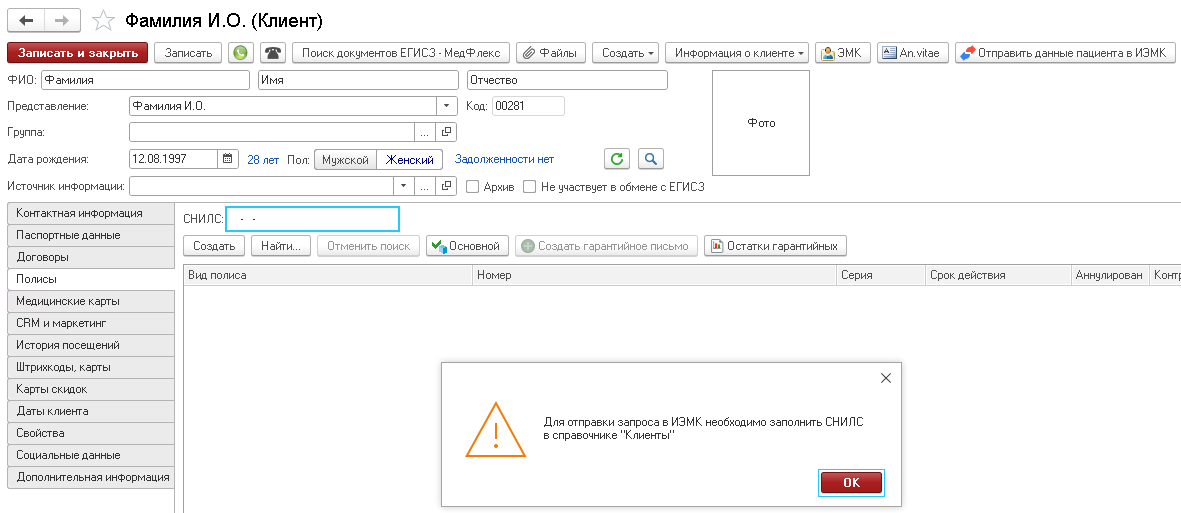
The error text indicates which data is missing. Fill in the required fields and repeat sending.
The organization's OID was not found
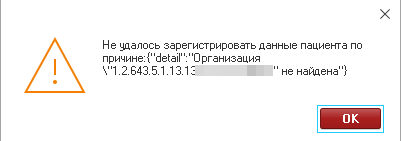
Check the correctness of the organization's token in the integration settings.
Invalid token header or credentials were not provided
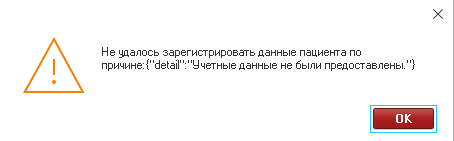
Make sure that:
- the required medical organization has been selected;
- the token was entered correctly;
- the token is inserted in the correct field.
Timeout exceeded
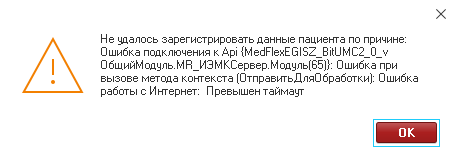
Check the value of the field «Адрес МедФлекс»and the status of the switch «Тестовый»in the integration settings.
I don't have enough rights to work
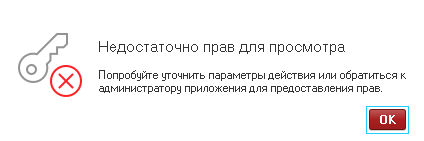
The current user does not have sufficient rights to work with integration. Log in with a user account with the necessary permissions, or add a role to an existing user«MR_ЕГИСЗ».
This instruction covers the basic steps. In difficult or unusual situations, do not hesitate to consult the documentation of your specific 1C version or the MedRoket support service.